


IMPORTANT: PLEASE READ THOROUGHLY BEFORE UNPACKING OR HANDLING FILM
Applications are NOT RECOMMENDED in the following situations:
- When temperatures are below 8°C or when outside temperatures are below zero
- To rough or cast glass surfaces
- To any surface that curves in two directions
WINDOW FILM is a very thin sheet of material that requires handling with great care. Creases and folding must be avoided and applications need to be carried out in a draught and dust free situation.
PREPARATION AND PRE-CLEANING are vitally important and care must be taken to flush any dirt particles out of the window frame. Some airborne dust may get under the film, but this is difficult to avoid completely and its presence will not affect the performance of the installation.
DURING DRYING OUT some haziness will be evident and this will disappear and dry out over a 2-4 week period.
CLEANING as for normal window after 4 weeks and always with a soft chamois leather or cloth and clean water.
PATTERNED GLASS in the case of patterned glass apply the film only to the smooth surface.
INTERNAL GLASS the product can be applied to either side.
NOTE : Where applicable, film certified to BSEN12600.
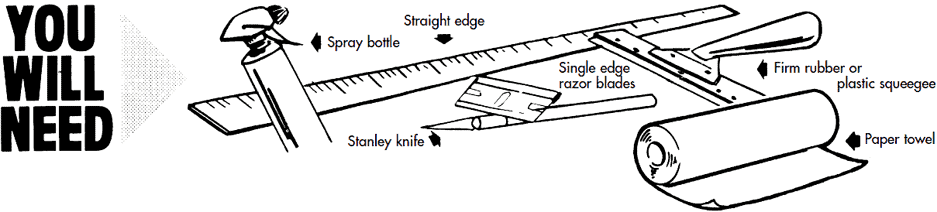
1. Window Preparation
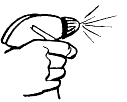
- Make up slip solution in spray bottle (1 tsp Johnson’s baby shampoo to 1 pint cold water)
- Place damp newspaper or a cotton cloth beneath the glass to be covered with window film.
- Remove paint, varnish or other foreign matter with a scraper and from frame edges using a brush. Use slip solution to avoid scratching the glass.
- Thoroughly wash glass with slip solution and squeegee dry, ensuring the glass surface is very clean and dust free.
2. Film Handling
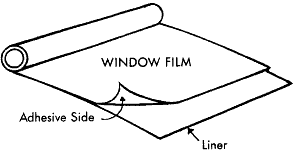 1. Adhesive surface is protected between window film and liner.
 2. Window film may be cut to approximate size with a very sharp blade. It is recommended that the film be cut at least 2 cm longer and wider than the glass. You are now ready to apply the film to the glass.
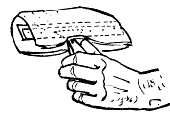
Note: Separate a corner of the window film and liner with 2 small pieces of adhesive tape on either side of the product.
3. Film Application
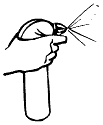
 1. Thoroughly wet glass with slip solution.
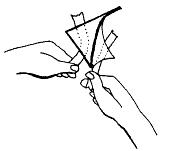
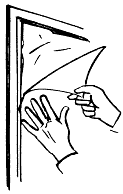 2. Place film on glass with liner facing you. From the ready separated corner carefully peel off the liner. Spray the adhesive surface generously with slip solution (you cannot apply too much solution).
 3. Carefully reverse film and line up straight edge at the top of the glass so that the adhesive side is now in contact with the glass.
Note: Keep film straight, do not allow film to curl up on itself or to wrinkle. A crease or wrinkle will not flatten out on application.
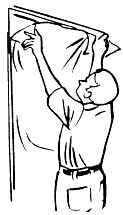
 4. Position film by gently sliding on wet surface and smoothing out large air bubbles. Ensure all glass area is covered by film.
4. Squeegee Technique
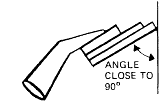
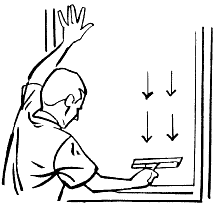
 1. Squeegee angle should be high, as shown, to prevent scratching the film, only use rubber squeegee never cloth or sponge.
 2. Wet film with slip solution to give slip for the squeegee.
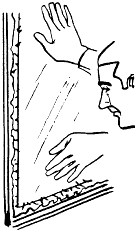
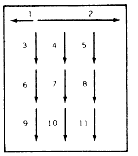
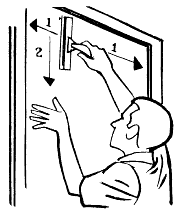 3. The first stroke should be horizontal across the top of the window.
4. The next stroke should be downward from one edge with succeeding strokes working down and away from the first strokes, until the window is completed to remove excess water.
 5. On final squeegee of the top and bottom edges the squeegee may be pushed toward the edge to remove excess water.
 6. If a particle is trapped behind the film, carefully lift the film from the nearest corner and remove the particle. Before replacing the film, spray sufficient slip solution to thoroughly wet the glass and film. Replace the film and re-squeegee.
5. Film Trimming
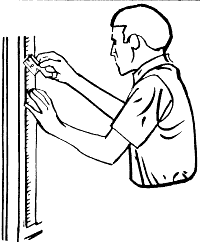 1. Place a straight edge to the edge of the window.
2. Trim the film using a razor blade or Stanley knife so that there is a gap of approx 2-5mm from film edge to frame.
3. Repeat for each edge of the window.
 4. After trimming, remove excess film.
5. Repeat entire squeegee procedure. A firm pressure is necessary to effect a strong bond.
 6. When trimming and final squeegeeing is completed wrap a paper towel over the edge of the squeegee and carefully and completely tamp dry edges of film.
Window Film Cleaning & Maintenance
See our helpful guide to cleaning & maintenance here.